Appearance
Pixie: set up a static IP
Some networks require a static IP address. This guide walks through configuring one on a Lumicast Pixie.
Prerequisites
- A USB keyboard
- Optionally a USB mouse
- A Pixie connected to the internet (cable or Wi-Fi)
Steps
Connect a keyboard
Attach a USB keyboard (and optionally a mouse) to the Pixie.
Open the terminal
Press Ctrl + Alt + T. If the terminal doesn't open, press the Windows key, navigate to System Tools > LXTerminal and open it.
Open NetworkManager
bash
sudo nmtuiSet up the connection
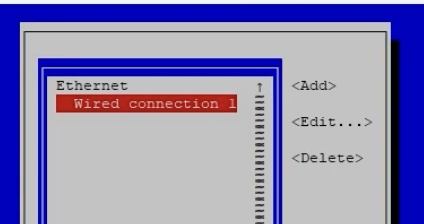
Navigate to Edit a connection:

Select the network connection you want to give a static IP and press Enter:
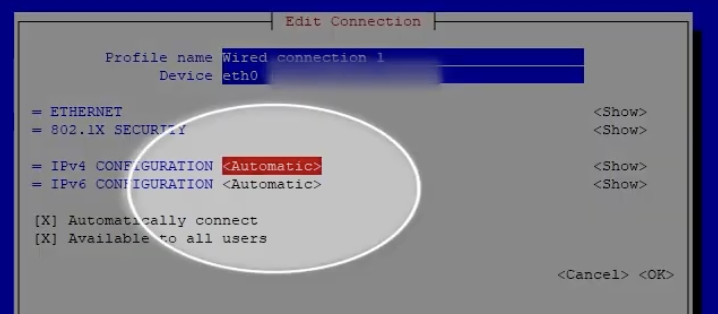
Move to the IPv4 configuration row and set it to Manual:
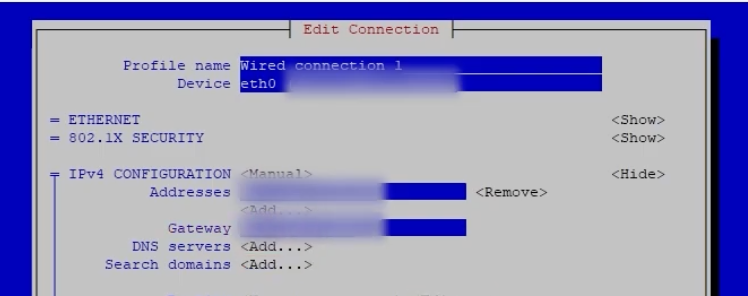
Press Show to expand the manual settings:

Enter your static IP address and gateway:
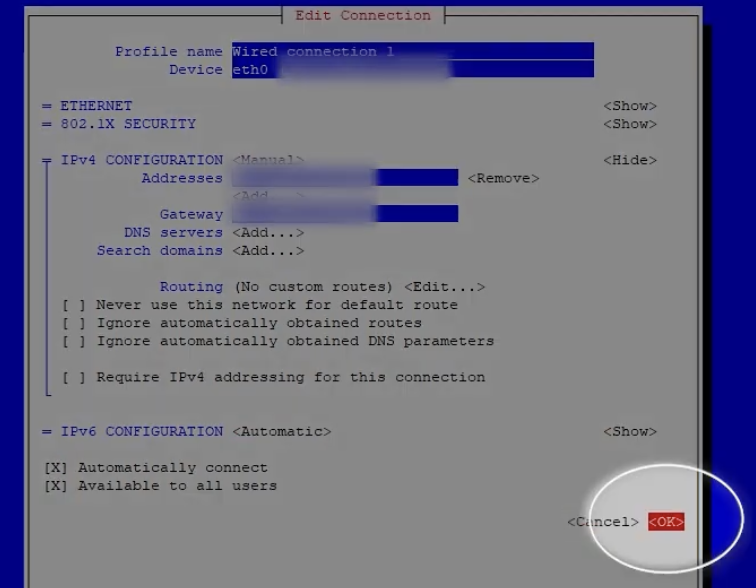
Select OK. The new static IP config is saved:
Go Back and Quit nmtui.
Restart the Pixie
bash
sudo reboot