Appearance
Connect Zermelo
Lumicast can pull a school's schedule (lesson timetable) straight from Zermelo and show it on your displays. This guide walks a Zermelo Portal administrator through granting Lumicast access and creating the authorization code you paste into Lumicast.
Partner rights
Zermelo has replaced the old "API token" integration with partner rights: instead of sharing a token directly, the school creates a partner for Lumicast, grants it access to specific endpoints and fields, and generates a one-time authorization code. The older "Zermelo (legacy)" connection in Lumicast keeps working for existing setups, but new connections should use the partner flow described here.
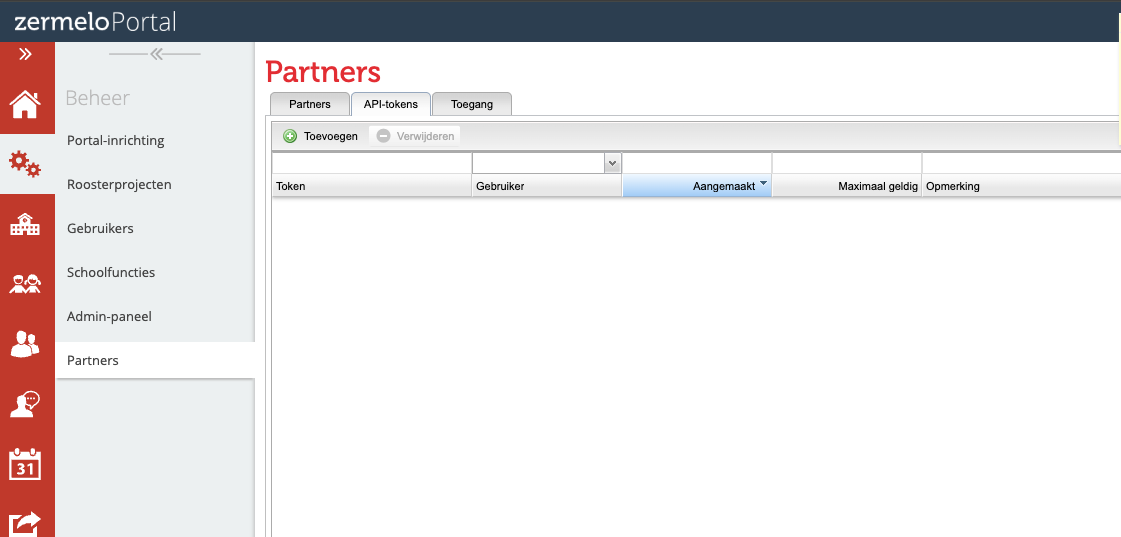
1. Create the partner
In the Zermelo Portal, go to Beheer › Partners and open the Partners tab. Click Toevoegen.
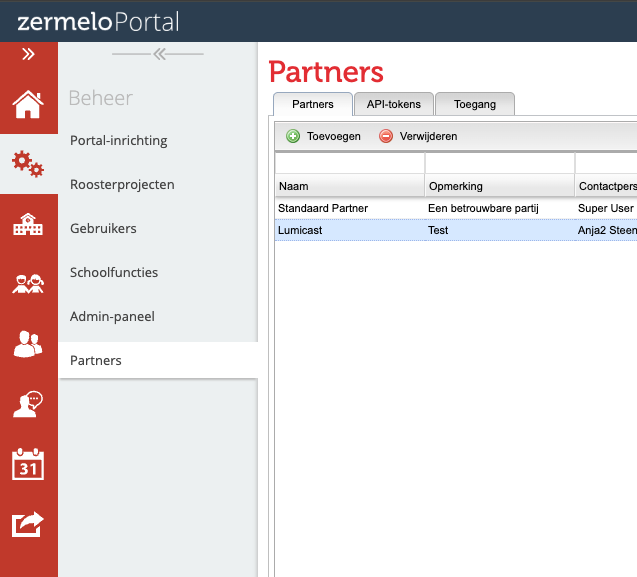
Fill in the partner details:
- Naam —
Lumicast - Contactpersoon school and Emailadres partner — your own details
- Projecten — select the schedule projects (roosterprojecten) whose timetable you want to show. Pick every school year / location you intend to display.
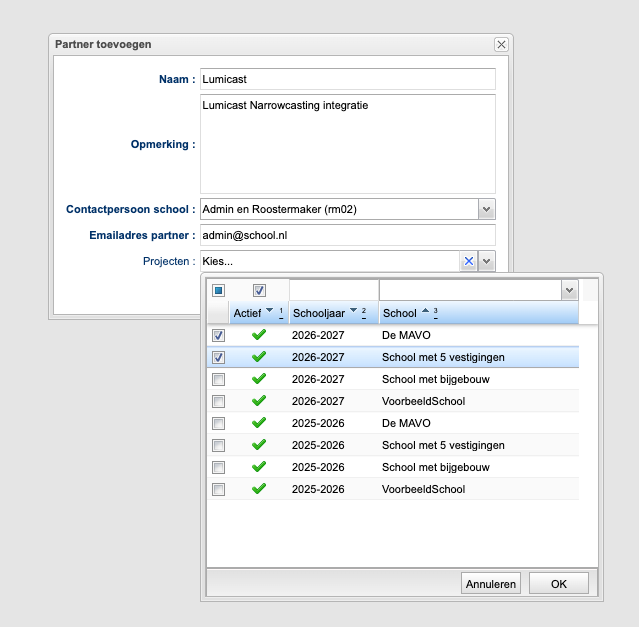
Click OK.
2. Grant access to the appointments endpoint
Open the Toegang tab and click Toevoegen.
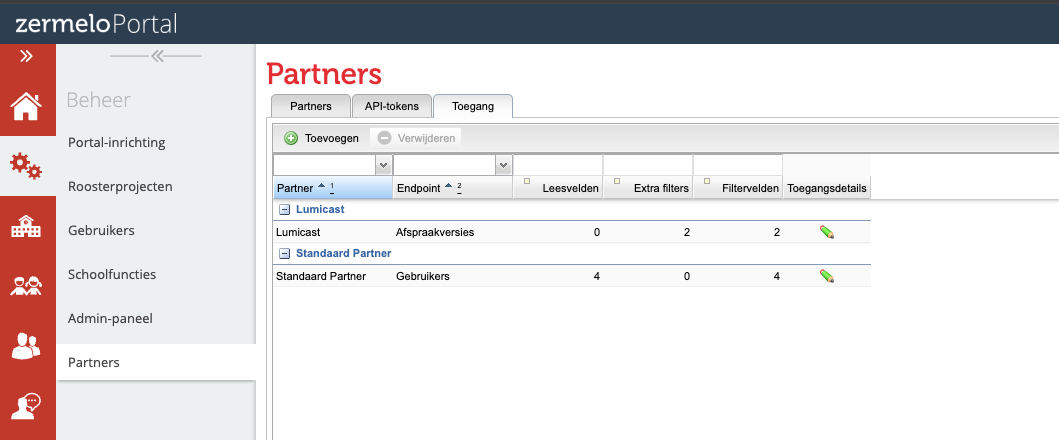
- Set Partner to
Lumicast. - Set Endpoint to appointments (Afspraakversies).
- Under Veldtoegang, set every field to Lezen (read). This is the simplest reliable setup — the schedule app uses most of these fields, and the few it can't get (they aren't offered to partners) it handles gracefully.
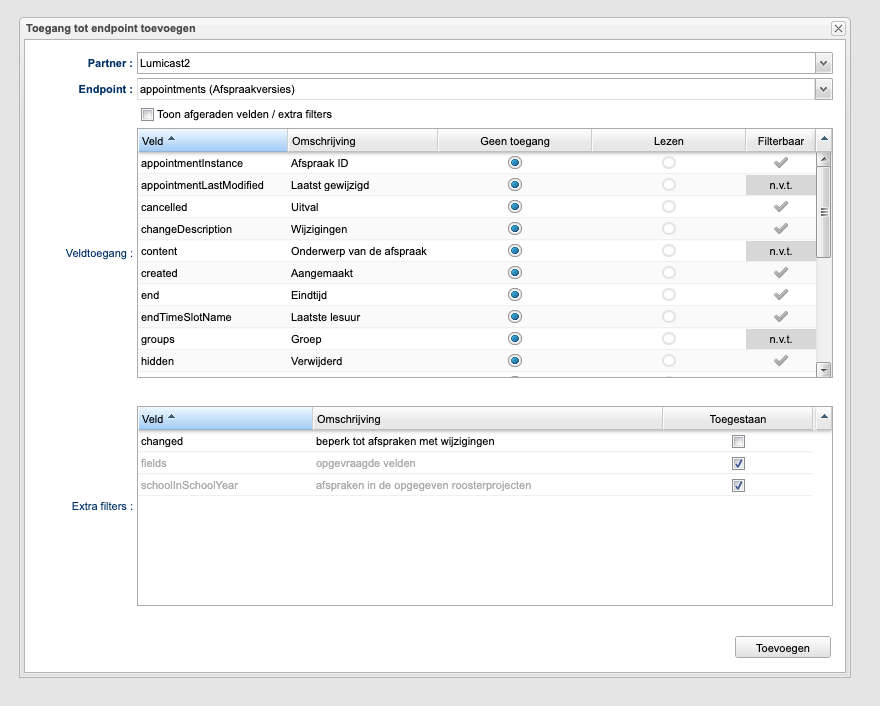
Read access is required
If a field has no read access, Lumicast won't request it, and if zero fields are granted the connection can't be created. At an absolute minimum these fields must be set to Lezen, or the schedule won't render correctly:
id, appointmentInstance, start, end, lastModified, type, valid, cancelled, changeDescription, subjects, teachers, groups, locations
Granting all fields avoids having to revisit this when the app starts using more of them.
- Under Extra filters, leave fields and schoolInSchoolYear allowed (required, enabled by default). The
startandendfields are filterable by default, which Lumicast uses to fetch only the schedule around the current day.
Click Toevoegen (or Bijwerken when editing an existing grant).
3. Create an API token
Open the API-tokens tab and click Toevoegen.
- Gebruiker — select the
Lumicastpartner. - Maximaal geldig — set an expiry date. Pick a date far in the future so the connection keeps working (e.g. several years out).
- Opmerking — optional, e.g.
Lumicast narrowcasting.
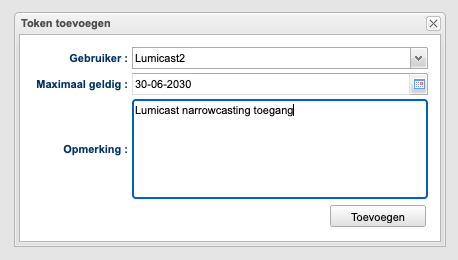
Click Toevoegen.
4. Copy the authorization code
The Portal shows a one-time authorization code. It is displayed only once and must be used within 30 days.
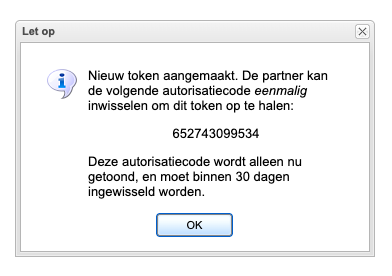
Copy this code — you'll need it in the next step.
5. Add the connection in Lumicast
- In Lumicast, create a new Zermelo schedule data source.
- When asked to add a connection, choose Zermelo and enter:
- Base URL — your portal address, e.g.
https://yourschool.zportal.nl - Authorization code — the code from step 4
- Base URL — your portal address, e.g.
- Save. Lumicast exchanges the code for an access token and shows your linked school(s).
- Pick the school year (roosterproject) you want to display.
Troubleshooting
- "Authorization code is already used or expired" — the code is single-use and valid for 30 days. Generate a new token (step 3) and try again with the fresh code.
- No schedule appears — make sure the partner has Lezen access to the
appointmentsendpoint (step 2) and that the relevant project is selected under Projecten (step 1). - Announcements — the partner API does not expose announcements. They are only available through the older "Zermelo (legacy)" connection.